The Norton Ebook Reader has functionality that is exclusive to instructors. This page details the Norton Ebook Reader tools that allow instructors to share highlights and annotations with students, and to monitor class-wide reading activity.
Can I share my highlights and annotations with my students?
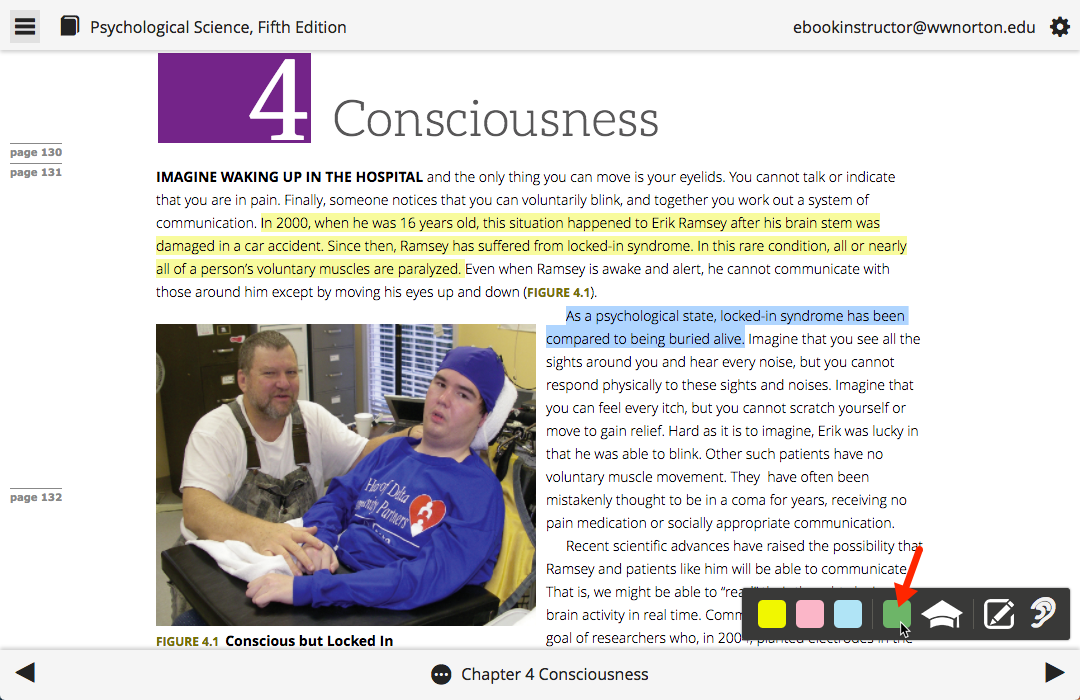
Sharing highlights: Use your cursor to highlight the desired text and the tool palette will appear. Select the green color and the highlighted text will be shared with your class.
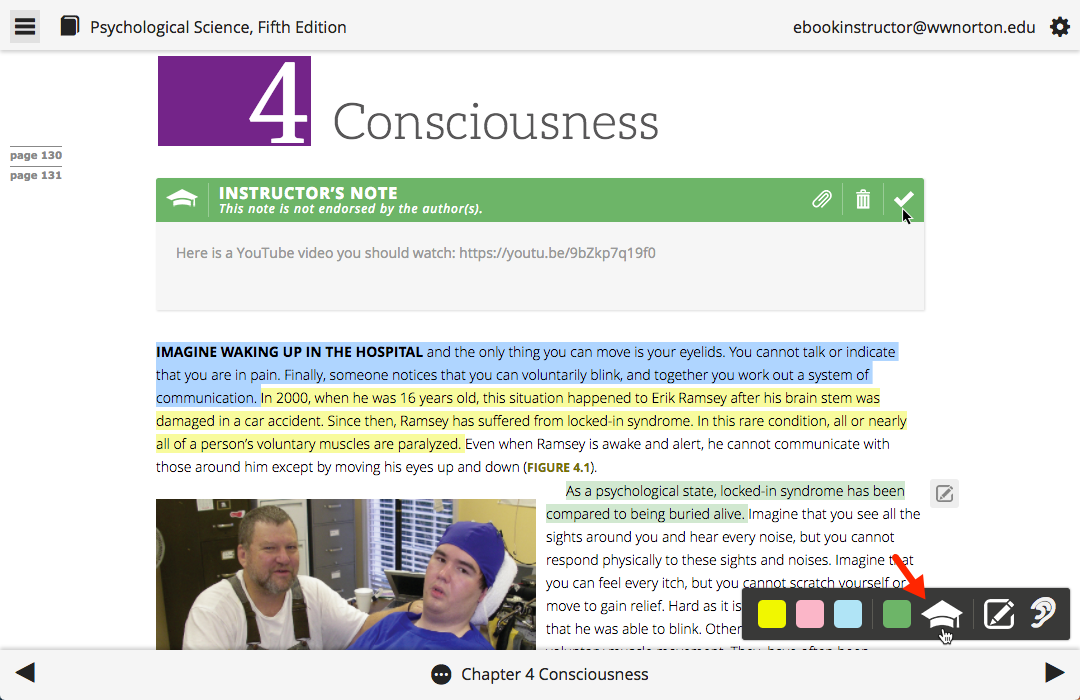
Sharing annotations: Use your cursor to highlight the desired text and the tool palette will appear. Select the mortarboard icon, which will allow you to create a shared instructor's note.
Still need help? Watch this video.
Note: In order for students to view shared highlights and annotations, they need to be enrolled in your Student Set.
Can I monitor student and class-wide reading activity?
Instructors can monitor activity in three ways:
- Individual student reading activity: After creating a Student Set and sharing the ID with students, you will have access to each student's reading progress.
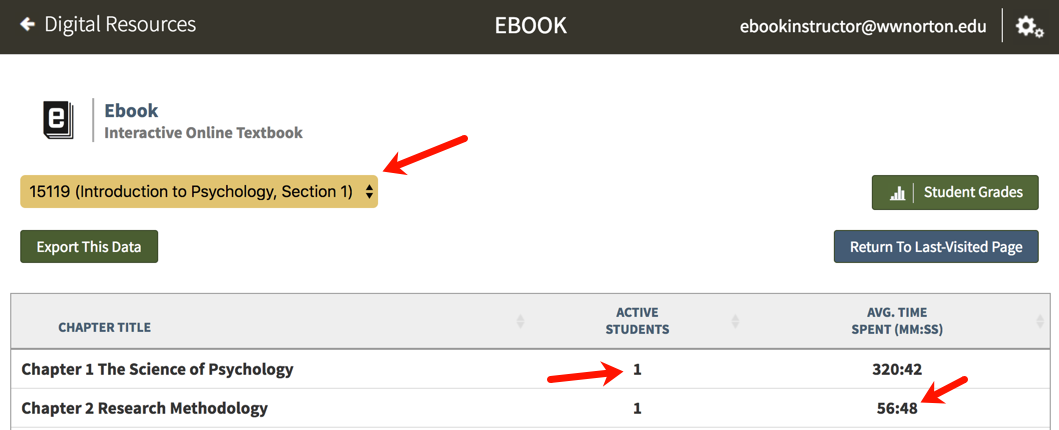
- Class-wide averages for reading time per chapter: In the Select a Student Set dropdown menu on your ebook homepage, select the Student Set for which you want to view reading time. Class-wide reading averages will then populate across from each chapter link. In the Active Students column, you'll see the number of students in your Student Set who have accessed the chapter. In the Avg. Time Spent (MM:SS) column, you'll see the average time spent for students who have accessed the chapter.
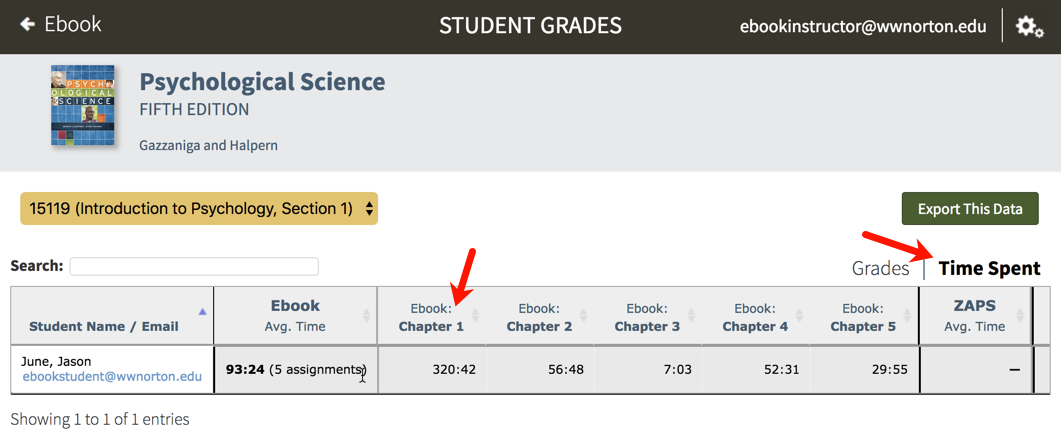
- Individual student ebook access per chapter: In the Select a Student Set dropdown menu on your ebook homepage, select the Student Set for which you want to view reading time. Click on the Student Grades button.

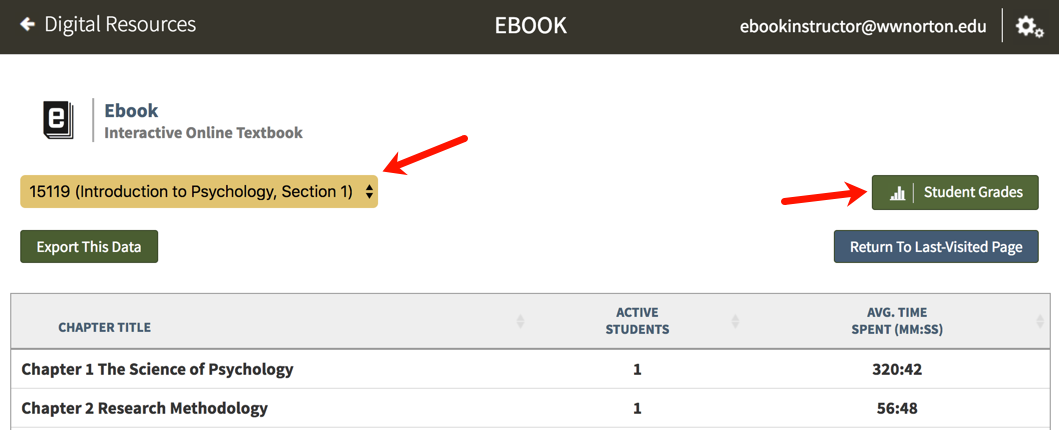
Then click Time Spent at the top right of the report. You'll now be able to view both individual chapter ebook access time and aggregate access time for the entire ebook for each student.
Still need help? Watch this video.
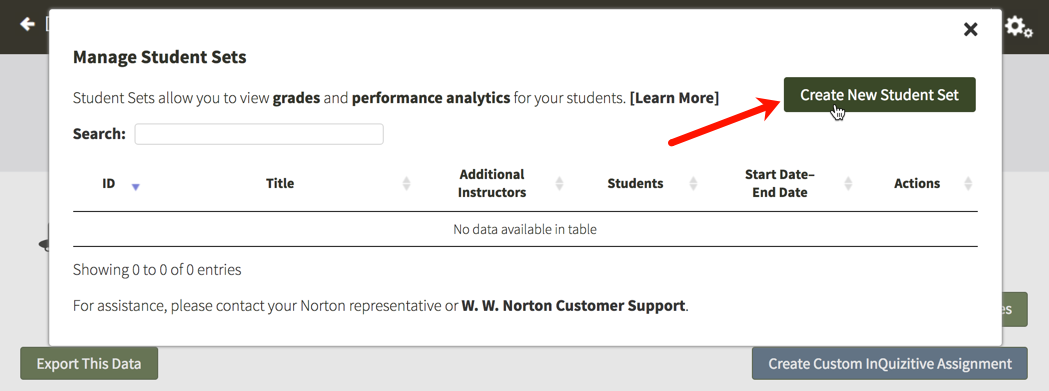
How do I create a new Student Set?
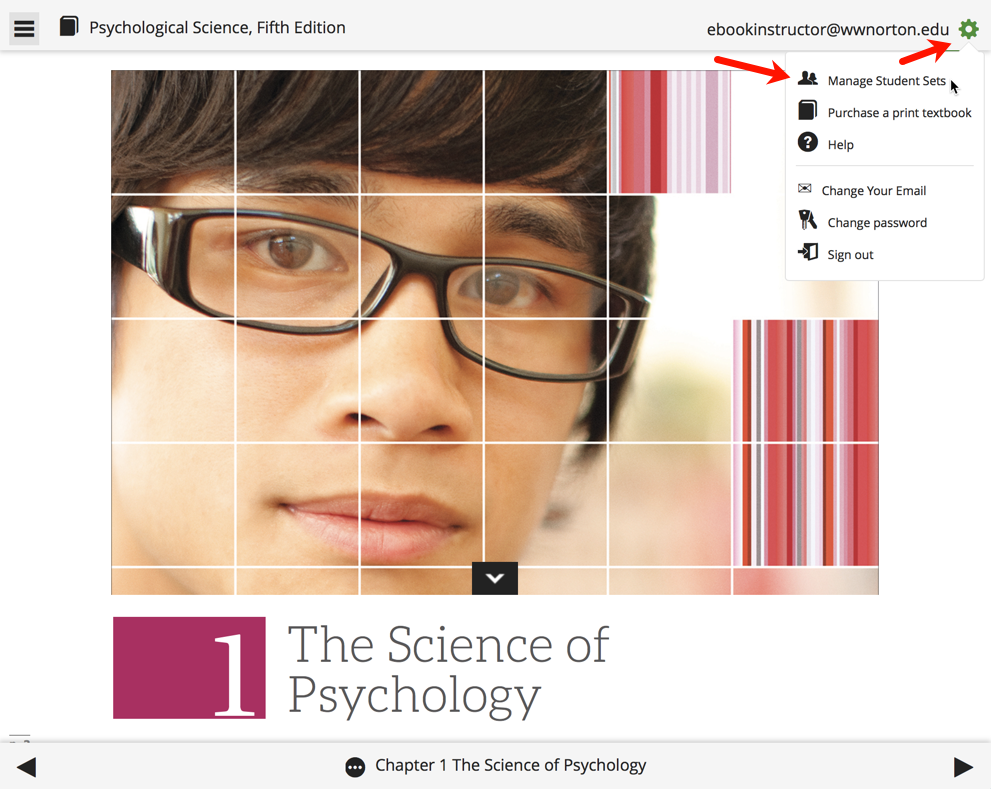
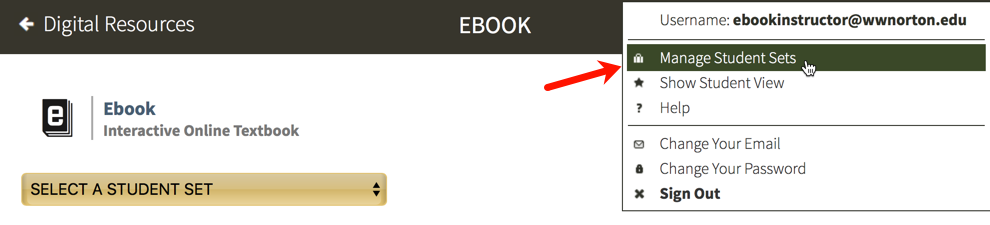
Click on the gear menu in the upper-right corner of the page and select Manage Student Sets from the menu.
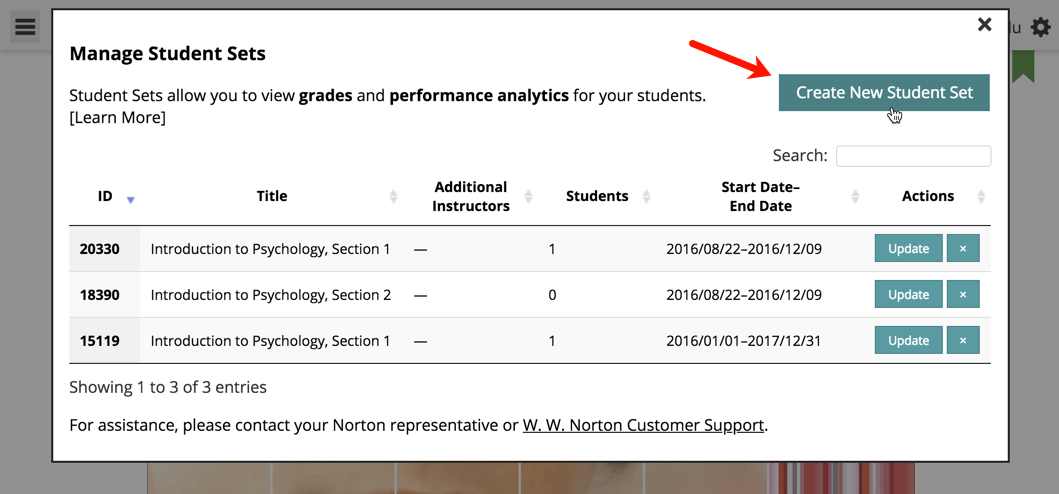
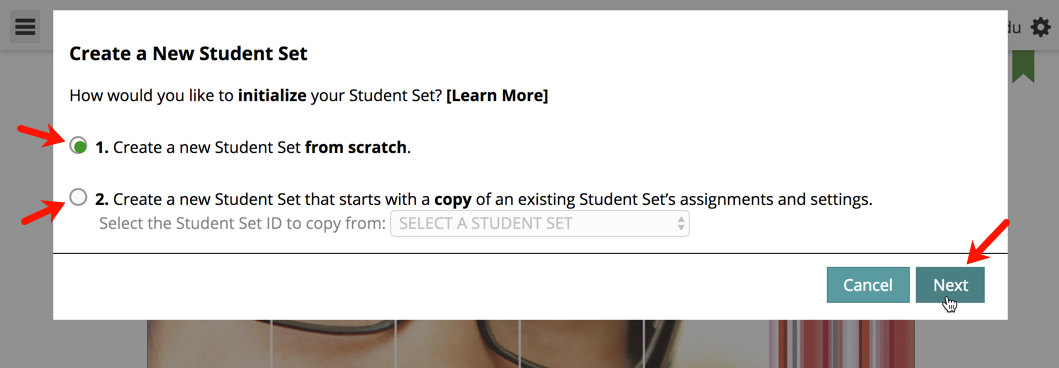
Click the Create New Student Set button.
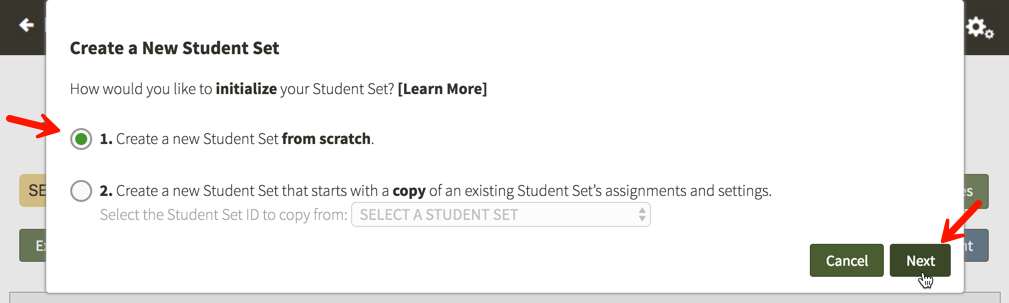
Select the type of Student Set you would like to create and click the Next button.
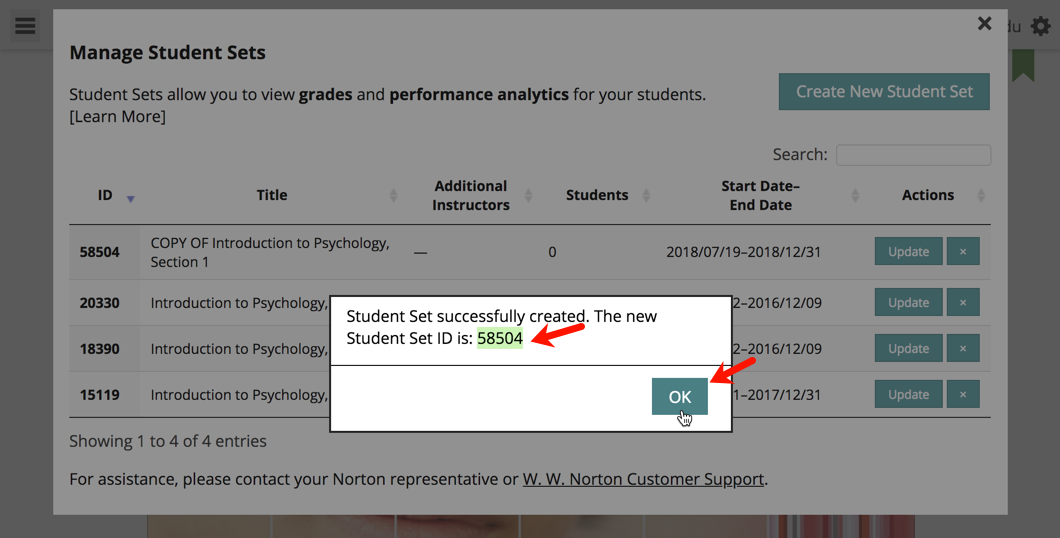
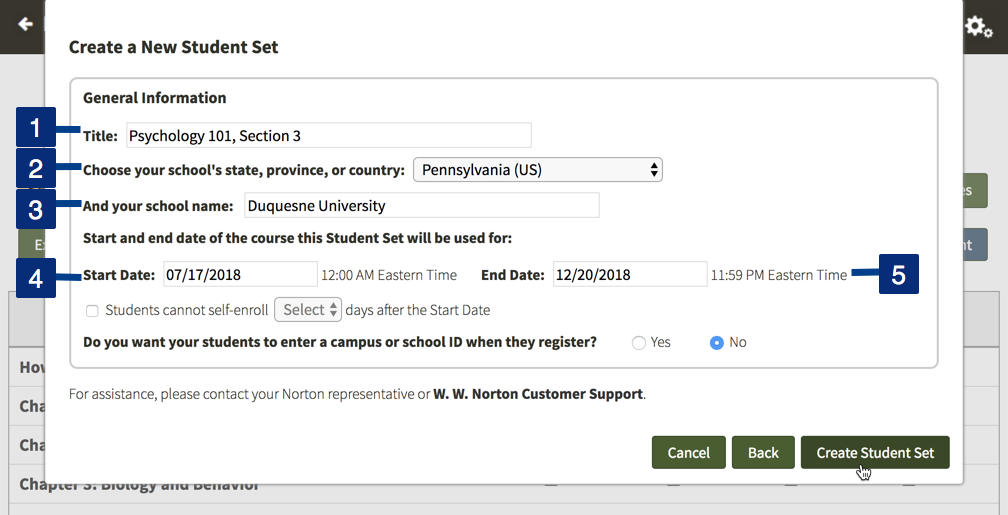
Enter a title for your Student Set, select your state, province, or country, start typing your school's name into the field that appears and select your school from the list, set a start and end date for the Student Set, and finally, click the Create Student Set button. Make a note of the Student Set ID number and distribute it to your students.
How do I edit an existing Student Set?
Note: You can edit any part of the information related to a Student Set except for the associated school and the Student Set ID number itself.
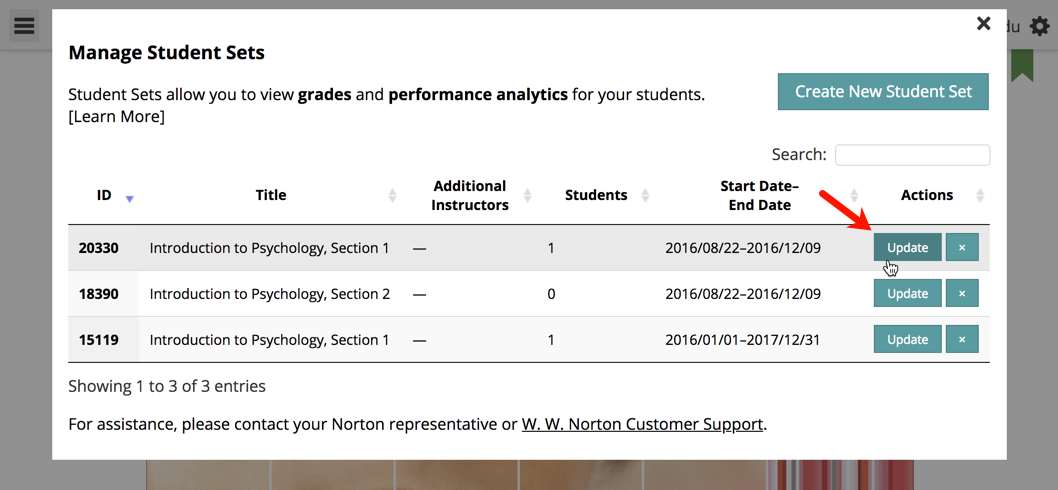
Click on the gear menu in the upper-right corner of the page and select Manage Student Sets from the menu.

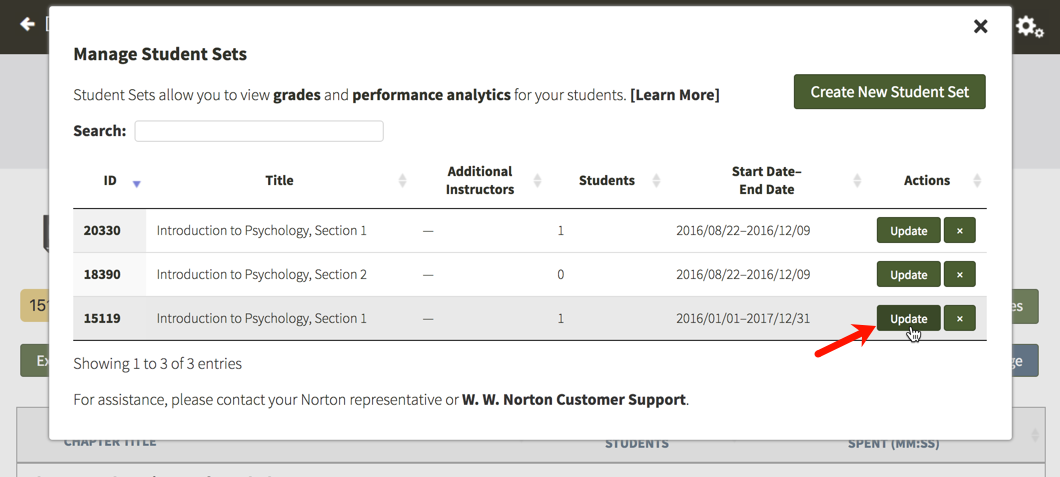
Click the Update button to the right of the Student Set you would like to edit.
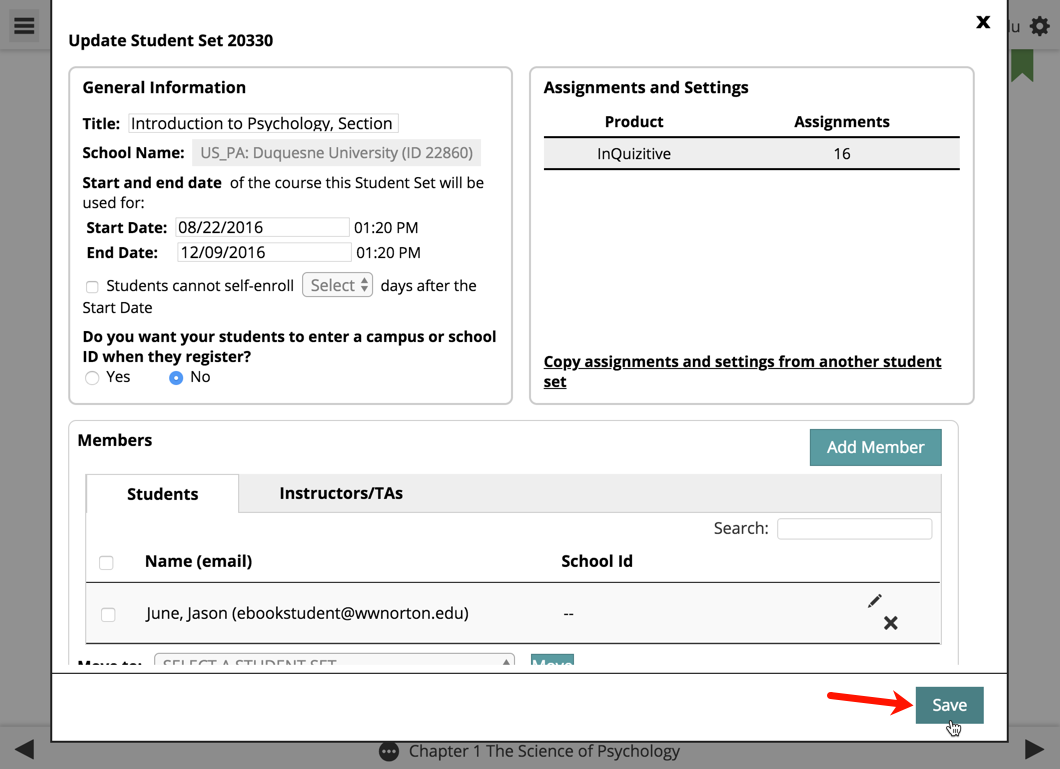
When you are finished editing the Student Set, click the Save button to save your changes and return to the Manage Student Sets window.
How do I add a Co-Instructor, Scoring Teaching Assistant, or Teaching Assistant to my Student Set?
Note: Adding a TA or STA to your Student Set will not grant that account access to the associated product(s); the TA or STA will still need to register or purchase access to be able to use the Digital Resources for your textbook.
Click the gear menu at the upper-right of the page and select Manage Student Sets from the menu.

Click the Update button to the right of the Student Set to which you would like to add a co-instructor, scoring TA, or TA.

In the Members section, click the Add Member button.
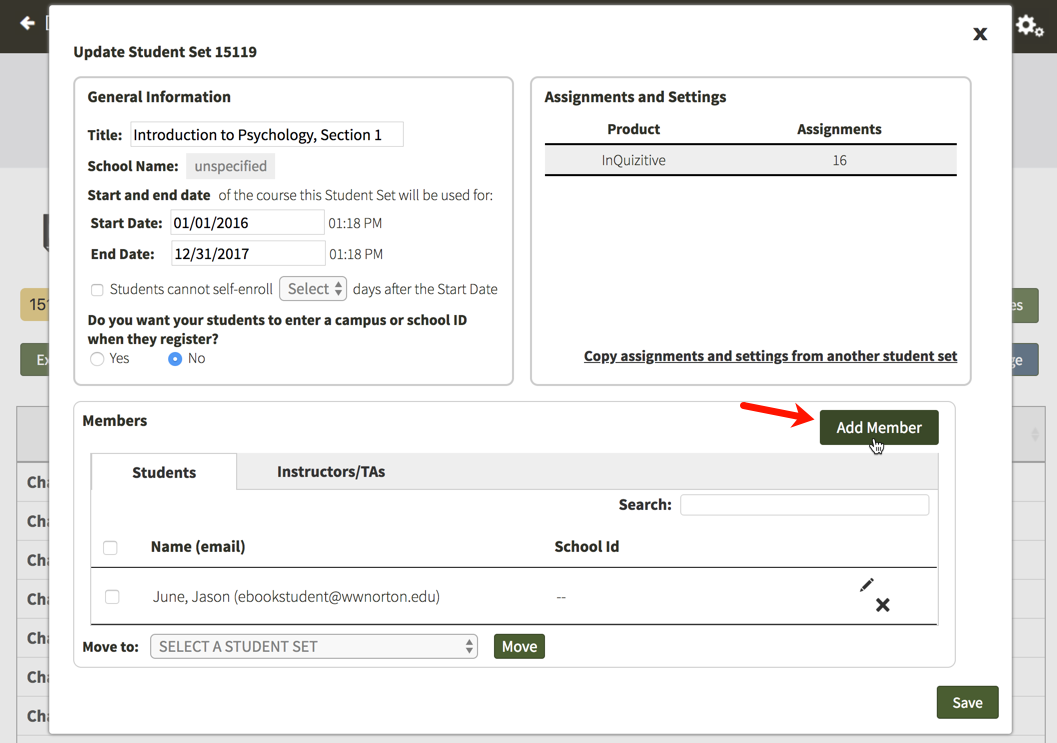
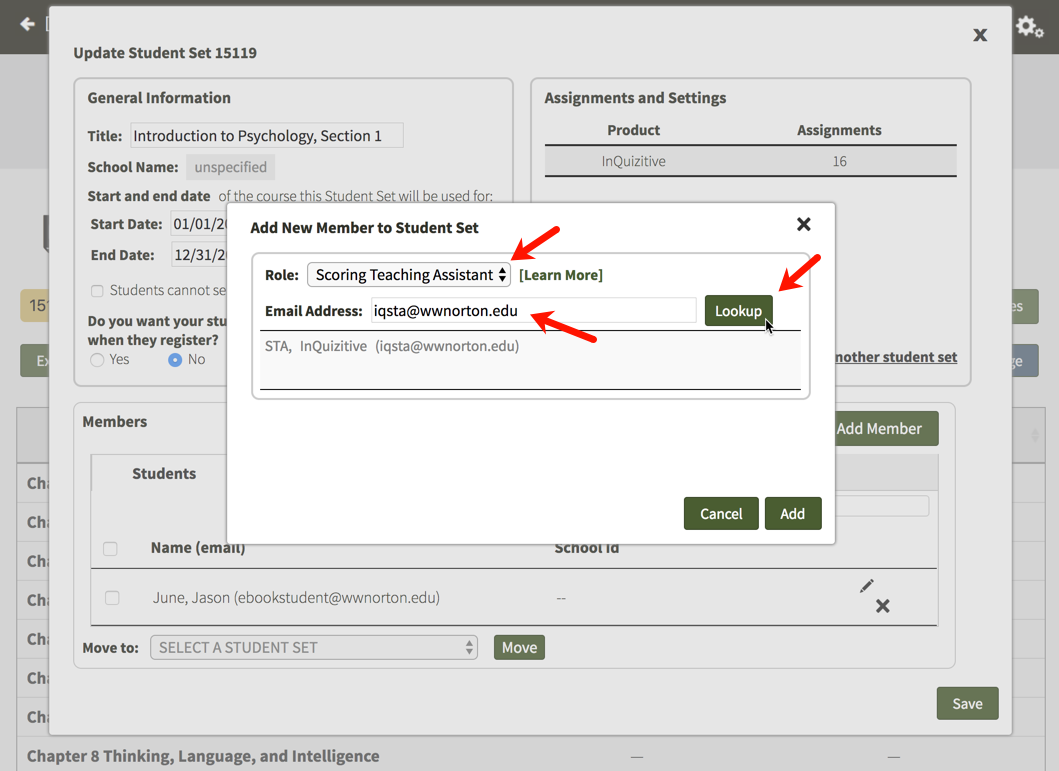
In the Role dropdown menu, select the permission level you would like to give the person who you are adding to your Student Set. For a comparison of the four different roles, please see the Overview of Role Permissions section below. Type in the person's email address and click the Lookup button.
- If adding a co-instructor, the person you are adding must have a Norton account with full instructor privileges. For help with this, please contact the W.W. Norton Service Desk.
- If you are adding a scoring TA or TA, this person does not need to have a pre-existing Norton account. In the case that they do not have a Norton account, we will send them an email with log in instructions once you add them to your Student Set.
- Note: If you are adding a student as a scoring TA or TA, you are changing their permissions in all Norton products. If they are enrolled as a student in another Student Set, please have them register with a separate email address when logging in as a TA or a scoring TA.
- Once you give an account a specific level of permission in your Student Set, you cannot downgrade that account to a lower permission level. For example, if you give an account scoring TA access, you cannot downgrade that account to TA access.
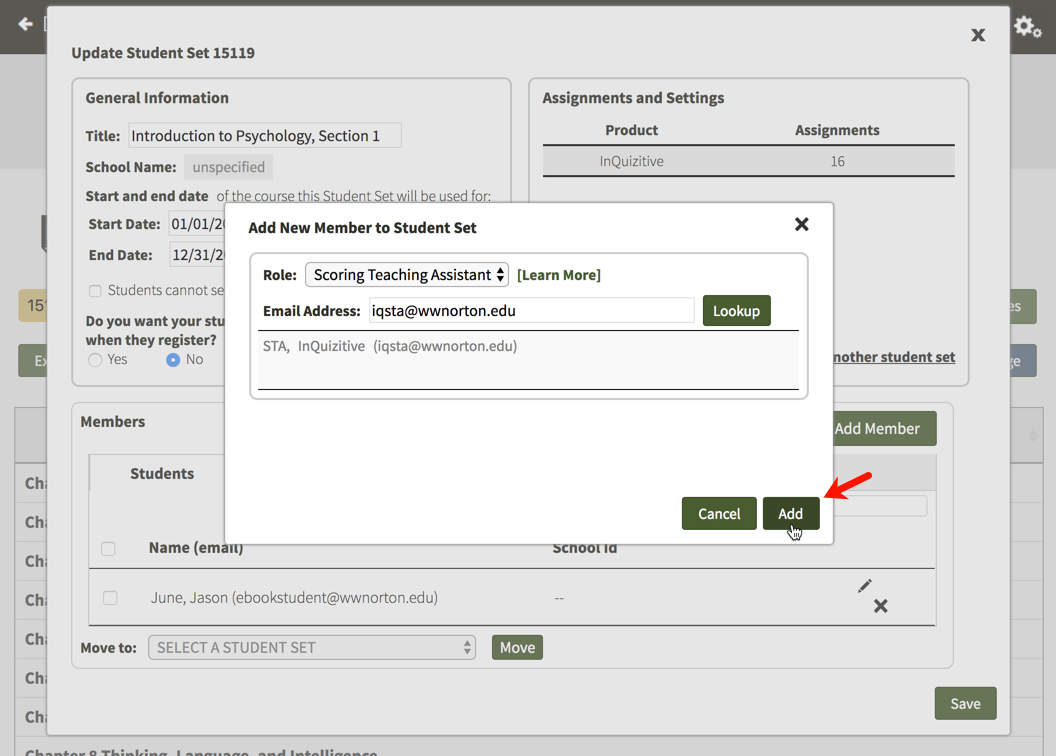
Click on the Add button to add the co-instructor, scoring TA, or TA to your Student Set.
When you are finished updating your Student Set, click on the Save button in the lower-right corner to save your changes.
Removing Co-Instructors, Scoring TAs, or TAs from Your Student Set
Click the gear menu at the upper-right of the page and select Manage Student Sets from the menu.

Click the Update button to the right of the Student Set from which you would like to remove a co-instructor, scoring TA, or TA.

In the Members section, click on the Instructors/TAs tab.
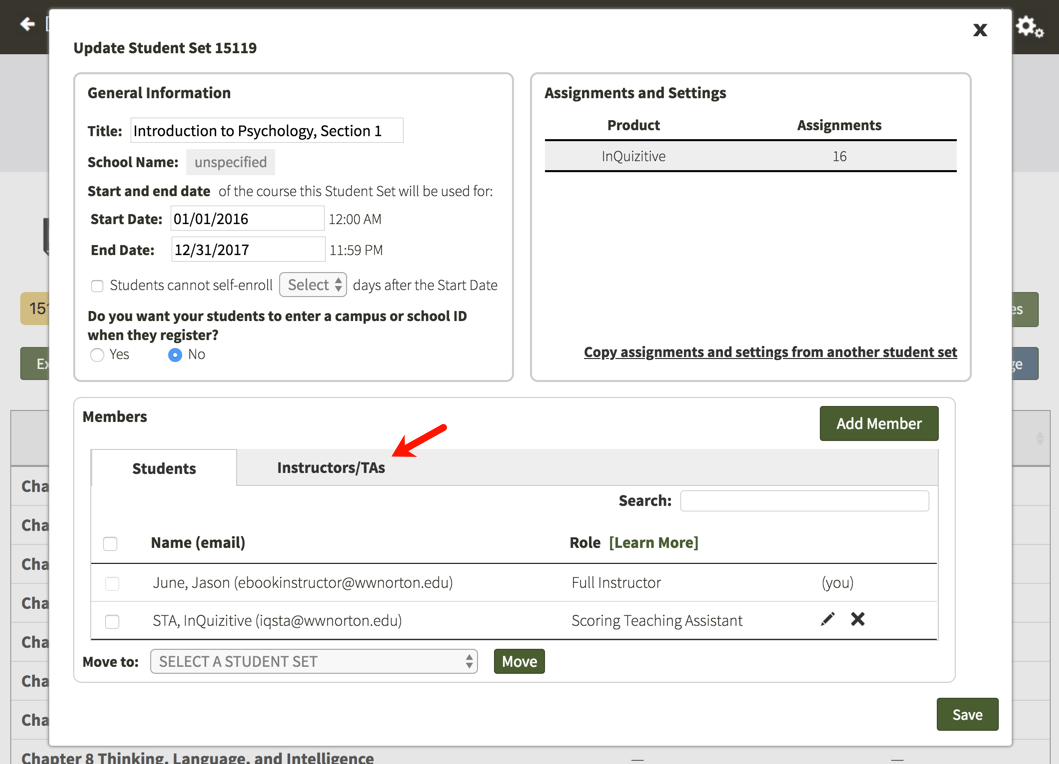
Click on the X icon to the right of the co-instructor, scoring TA, or TA that you would like to remove from your Student Set.
Note: Removing a scoring TA or a TA does not reset or change the permissions attached to their account.
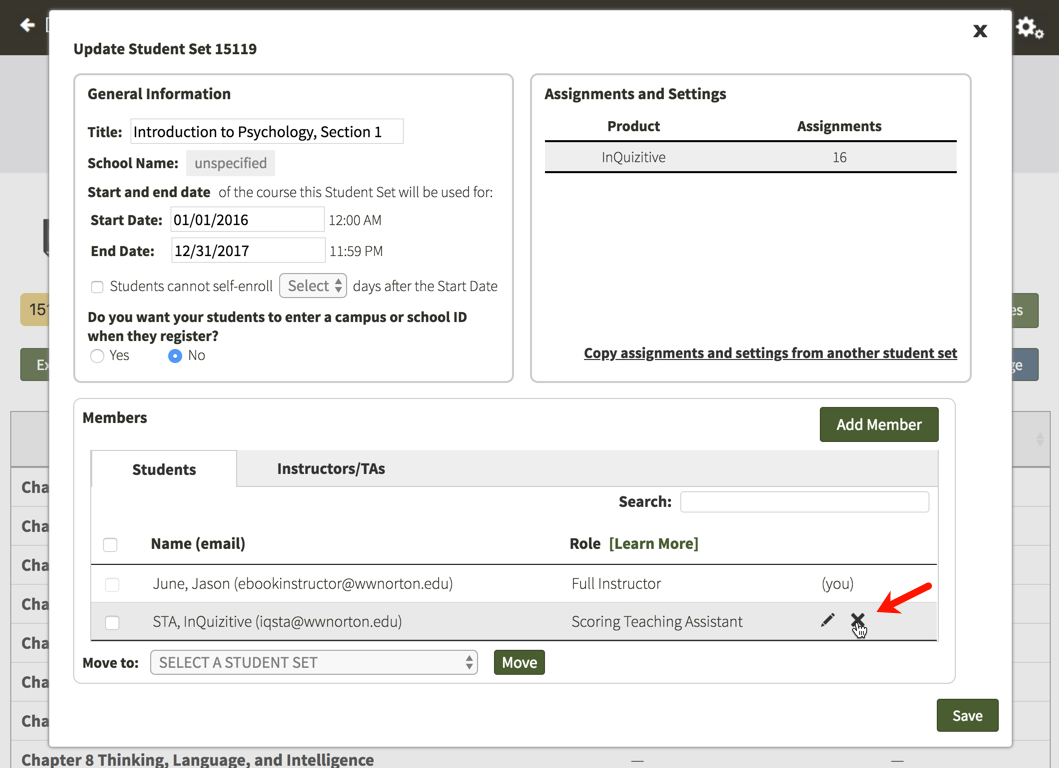
When you are finished updating your Student Set, click on the Save button in the lower-right corner to save your changes.
Overview of Role Permissions
Click on your product to see a complete list of role permissions for Teaching Assistants, Scoring Teaching Assistants, and Co-Instructors.
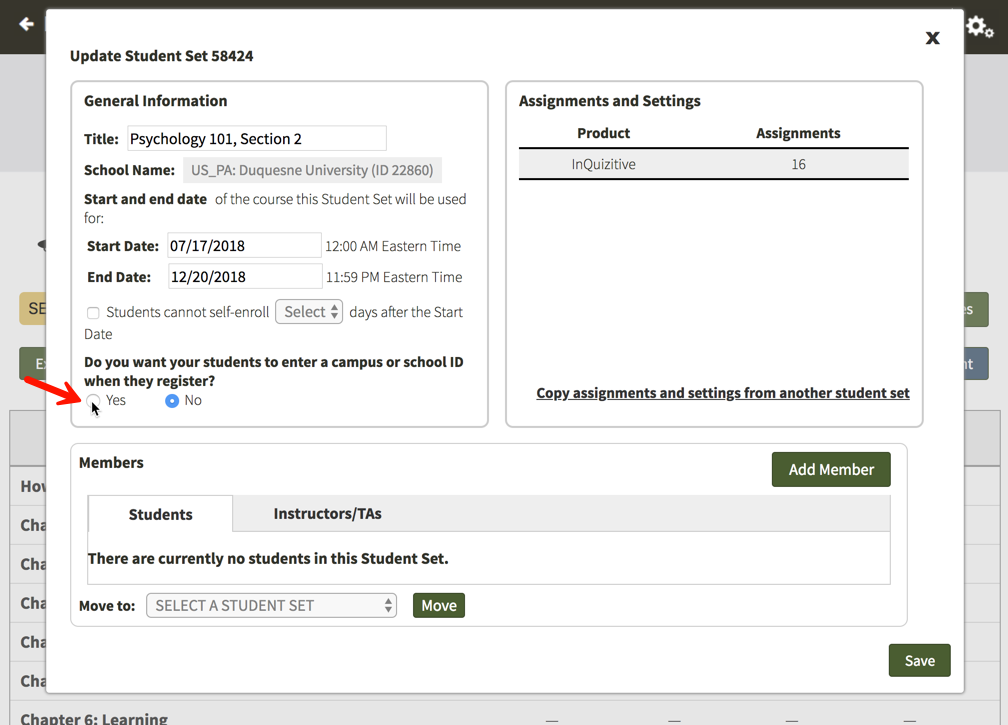
Can I require students to enter a school ID?
Require students to enter a school ID in a new Student Set
Click on the gear icon in the upper-right corner and select Manage Student Sets from the menu.

Click on the Create New Student Set button.

Option 1. Create a new Student Set from scratch will be selected by default. Click on the Next button.

Enter a title for your new Student Set, choose your school's state from the drop-down menu, begin typing your school's name into the text box that appears and select the proper school from the list, and select start and end dates for you Student Set.

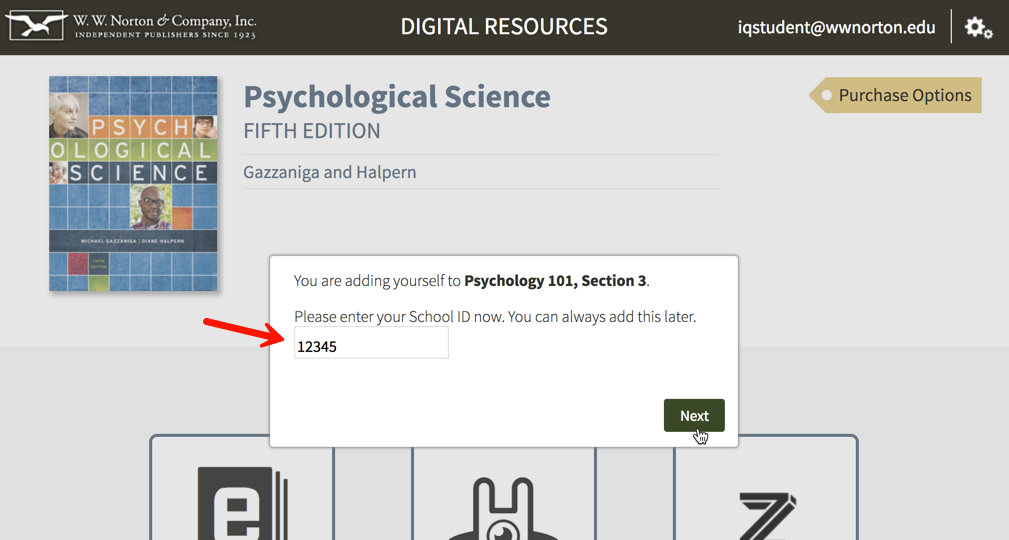
Select Yes to the right of Do you want your students to enter a campus or school ID when they register?
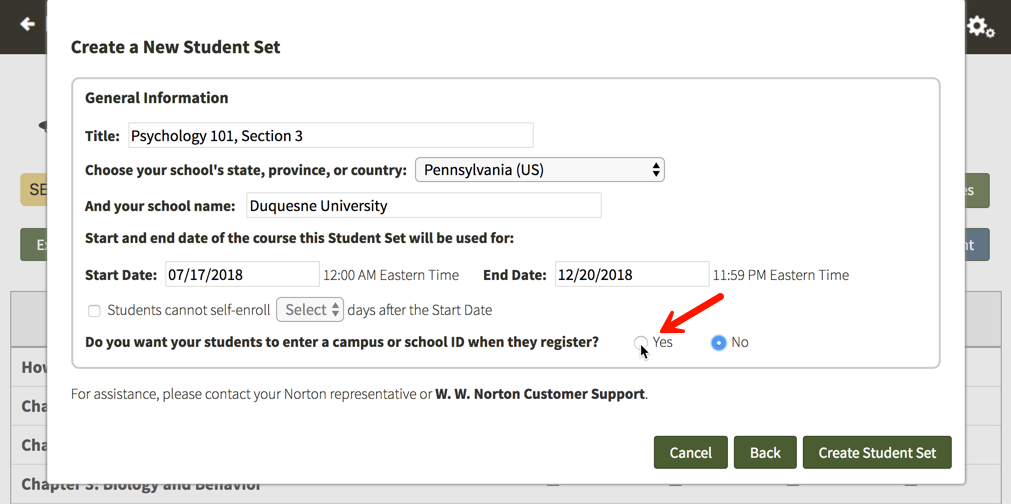
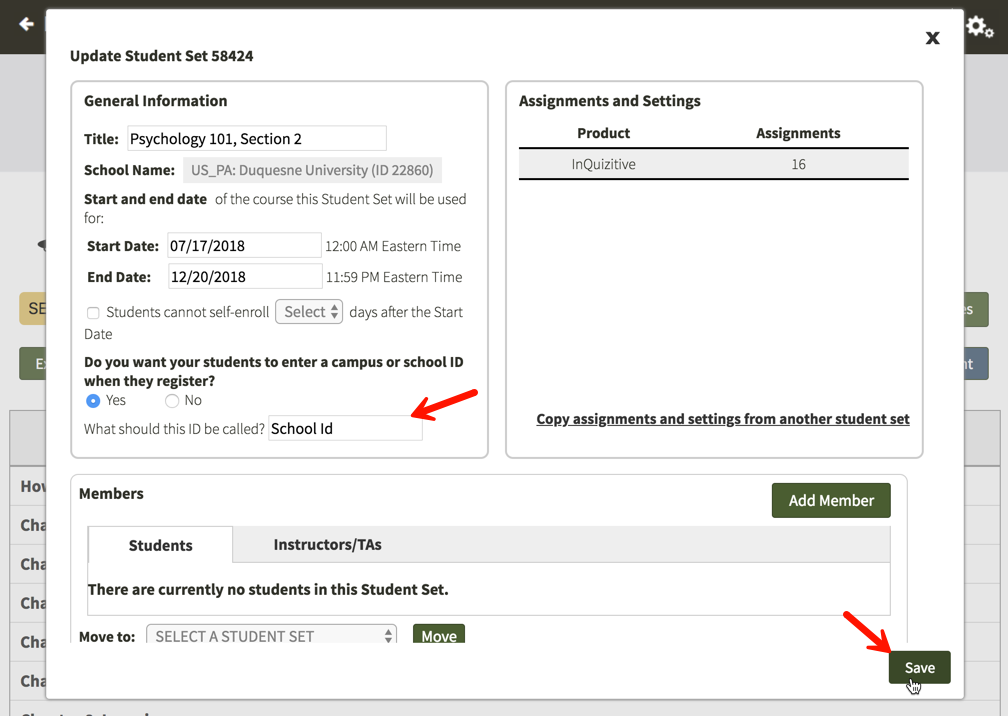
You will then be given the opportunity to change the label of the ID for your Student Set. The default School ID will be automatically populated into the text field but please feel free to change this to anything you'd like. This label will be displayed when your students are asked to enter their ID and when you review student results. IDs can contain letters and numbers and they do not have a minimum or maximum length.
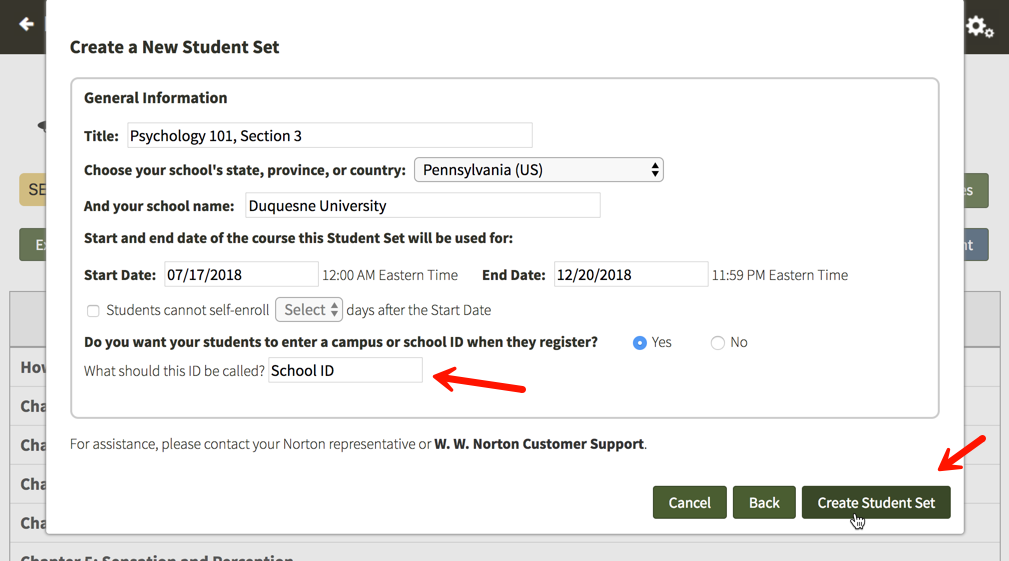
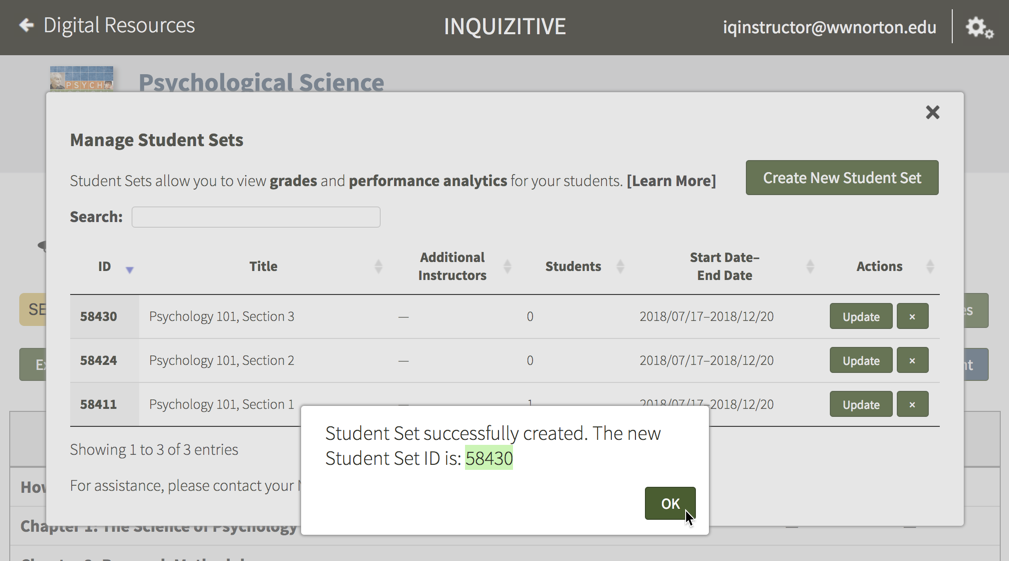
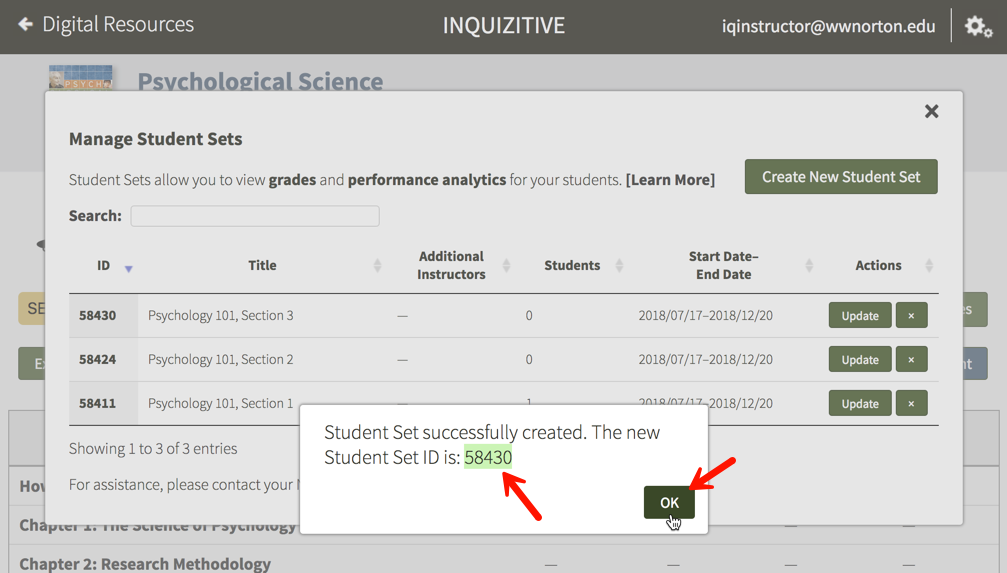
Finally, click the Create Student Set button and you will be given your new Student Set ID. Make a note of the Student Set ID and distribute it to your students so that they can join this Student Set.
When your students initially attempt to join this Student Set, they will be asked to enter their ID. If students are unsure of their ID or do not yet have one, they can simply click the Next button to add themselves to the Student Set and continue on to the digital resources. The next time they login to access the digital resources, they will be asked to enter their ID again. Students will be asked to enter their ID each time they access the digital resources until they finally enter one.
Require students to enter a school ID in an existing Student Set
Click on the gear icon in the upper-right corner and select Manage Student Sets from the menu.

Click on the Update button to the right of the Student Set for which you would like to require an ID.

Select Yes under Do you want your students to enter a campus or school ID when they register?
You will then be given the opportunity to change the label of the ID for your Student Set. The default School Id will be automatically populated into the text field but please feel free to change this to anything you'd like. This label will be displayed when your students are asked to enter their ID and when you review student results. IDs can contain letters and numbers and they do not have a minimum or maximum length. Click on the Save button when you are finished.
The next time your students login and access the digital resources, they will be asked to enter their ID. If students are unsure of their ID or do not yet have one, they can simply click the Next button to continue on to the digital resources. The next time they login to access the digital resources, they will be asked to enter their ID again. Students will be asked to enter their ID each time they access the digital resources until they finally enter one.

Can I prevent students from enrolling in a Student Set after a specific number of days?
Prevent students from enrolling after a specific number of days in a new Student Set
Click on the gear icon in the upper-right corner and select Manage Student Sets from the menu.

Click on the Create New Student Set button.
Option 1. will be selected by default. Click on the Next button.
Enter a title for your new Student Set, choose your school's state from the drop-down menu, begin typing your school's name into the text box that appears and select the proper school from the list, and select start and end dates for you Student Set.
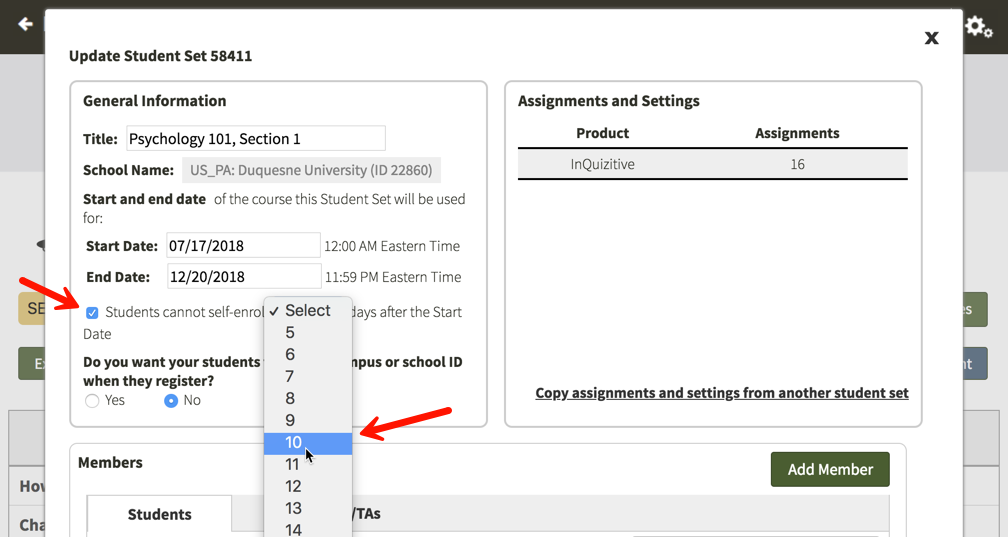
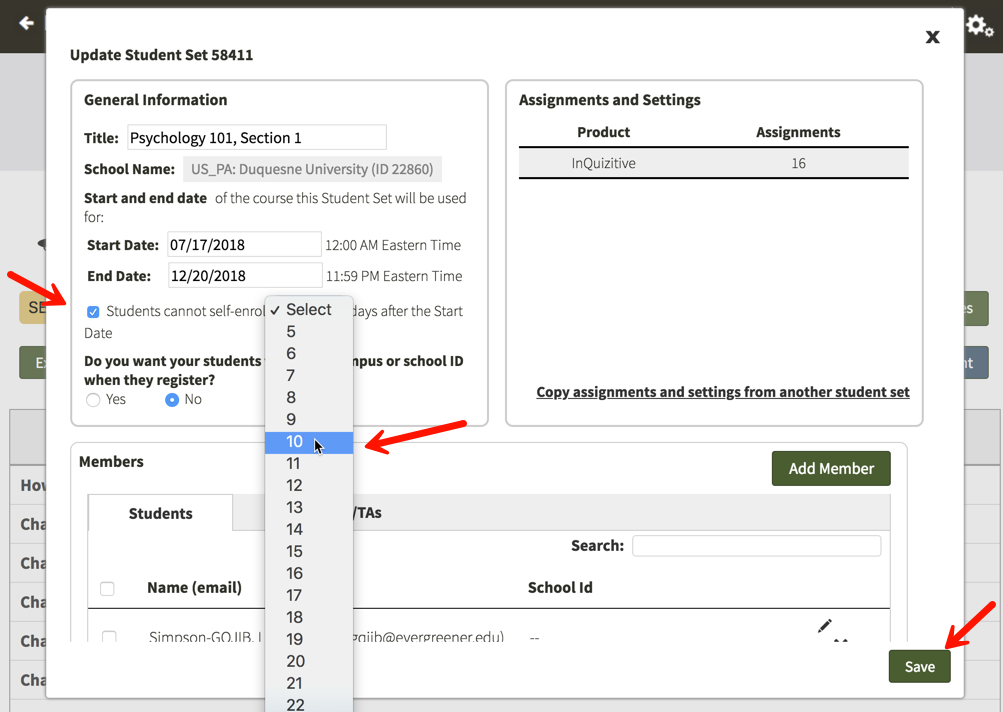
Click the checkbox to the left of Students cannot self-enroll Select days after the Start Date and use the Select drop-down menu to choose how many days after the start date of your Student Set you would like to close the self-enrollment period. You can select any number from 5 to 100 days after the start date.
Finally, click the Create Student Set button and you will be given your new Student Set ID. Make a note of the Student Set ID and distribute it to your students so that they can join this Student Set.
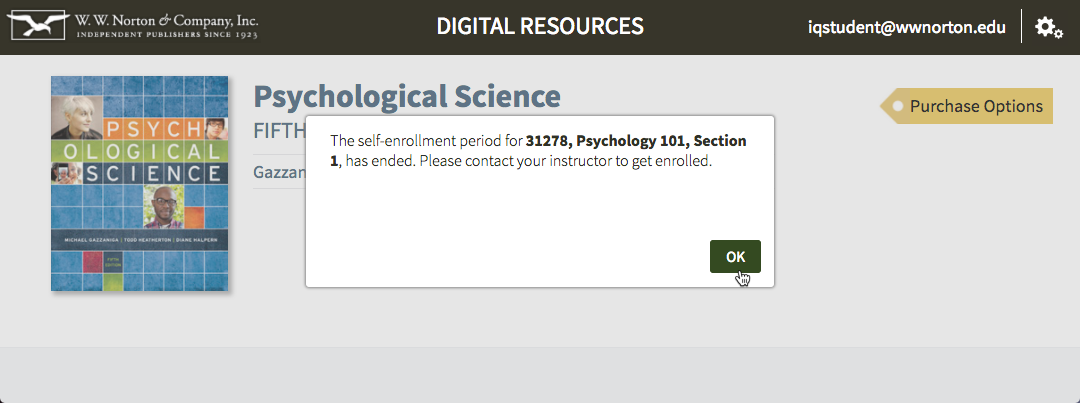
Any students who try to join this Student Set after the self-enrollment period has ended will receive the message below. Since the self-enrollment period has ended, you will need to manually add students to the Student Set from that point on.
Prevent students from enrolling after a specific number of days in an existing Student Set
Click on the gear icon in the upper-right corner and select Manage Student Sets from the menu.
Click on the Update button to the right of the Student Set for which you would like to end the self-enrollment period after a specific number of days.
Click the checkbox to the left of Students cannot self-enroll Select days after the Start Date and use the Select drop-down menu to choose how many days after the start date of your Student Set you would like to close the self-enrollment period. You can select any number from 5 to 100 days after the start date. Click the Save button when you're finished.
Any students who try to join this Student Set after the self-enrollment period has ended will receive the message below. Since the self-enrollment period has ended, you will need to manually add students to the Student Set from that point on.
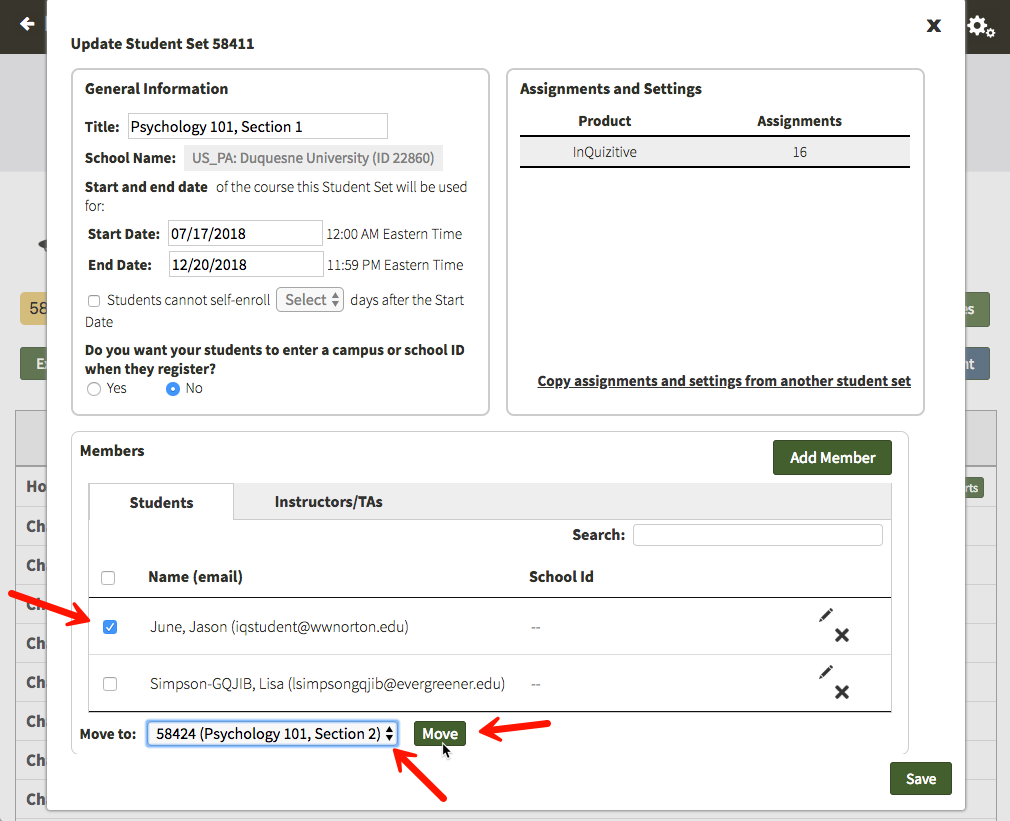
How do I move students from one Student Set to another?
Click on the gear icon in the upper-right corner and select Manage Student Sets from the menu.

Click on the Update button to the right of the Student Set in which the student is currently enrolled.

In the Members section, locate the student you would like to transfer to another student set and click the checkbox to the left of his or her name. Using the drop-down menu to the right of Move to: select the new Student Set and click the Move button.
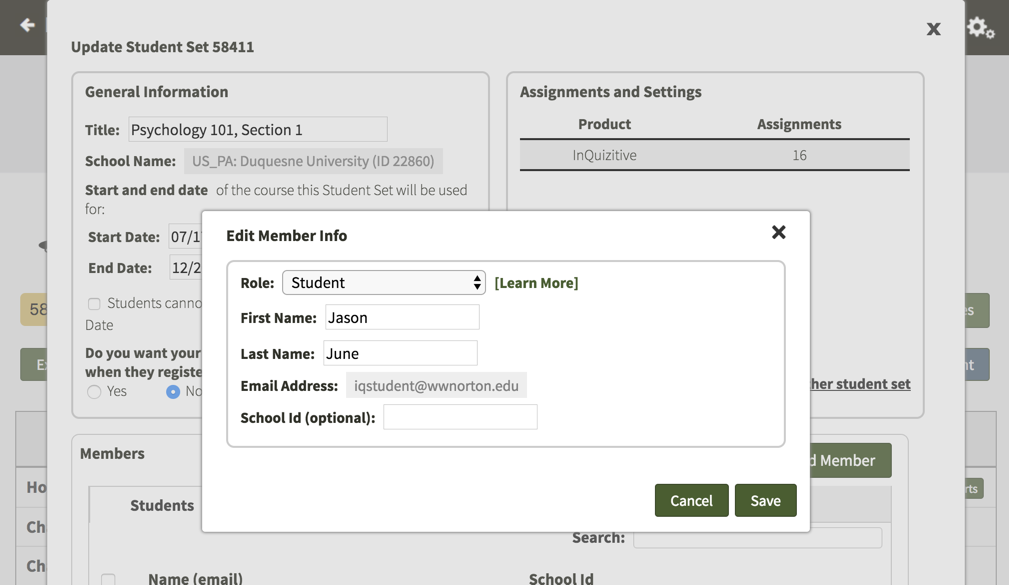
How do I edit student information within a Student Set?
Click on the gear icon in the upper-right corner and select Manage Student Sets from the menu.

Click on the Update button to the right of the Student Set in which the student is currently enrolled.

Click on the pencil icon to the right of the student whose information you would like to modify.
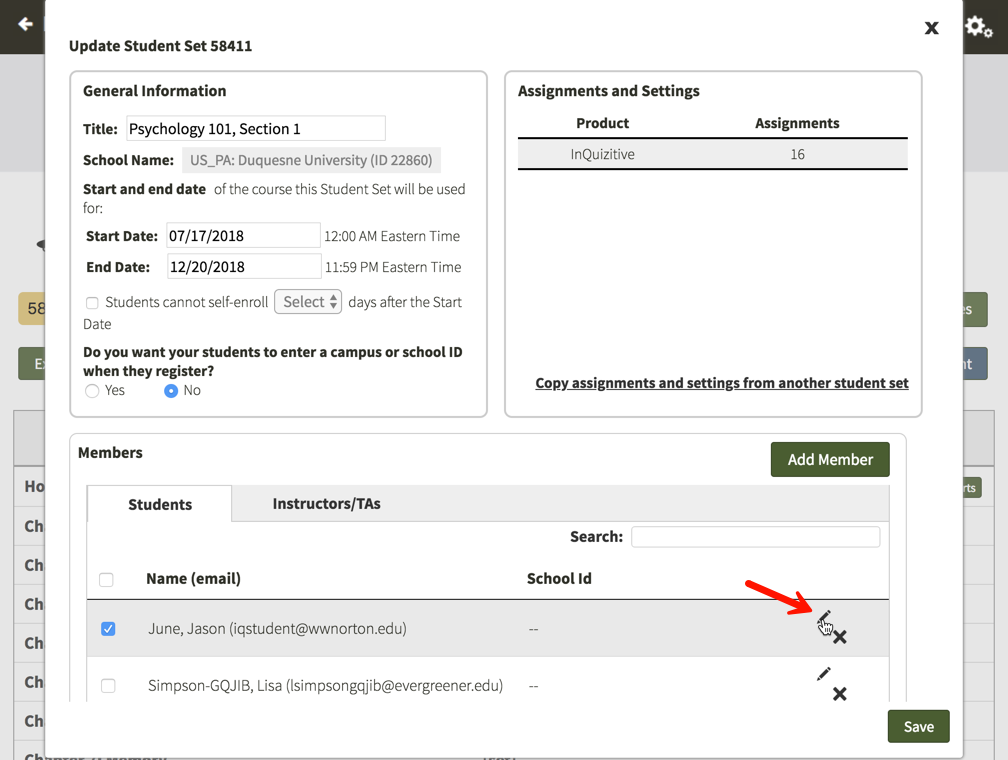
Using this window, you can adjust the role of the student, change the first or last name, and add or edit an ID. There is no way to change a student's email address. If you have a student who needs to make a change to their email address, please ask them to contact Norton Customer Support for assistance.