After building your test, you’ll want to export it from Norton Testmaker before uploading it to Moodle. See instructions to export the test from Norton Testmaker.
Please see the demonstration below for a walkthrough on how to import your test to Moodle. To open this demonstration in a new tab, please click here. For a transcript of the steps on importing to Moodle 3 click here.. For a transcript of the steps on importing to Moodle 4 click here..
Importing a Test to Moodle
- Log into Moodle.
- Navigate to the course where you wish to import the test.
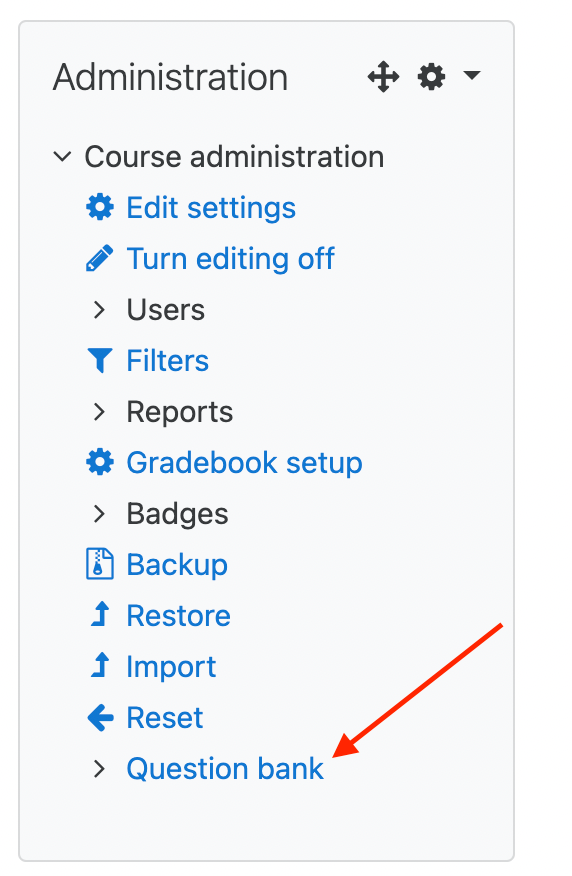
- In the Course Administration menu, select Question bank.
 Then select the Import tab from the next screen.
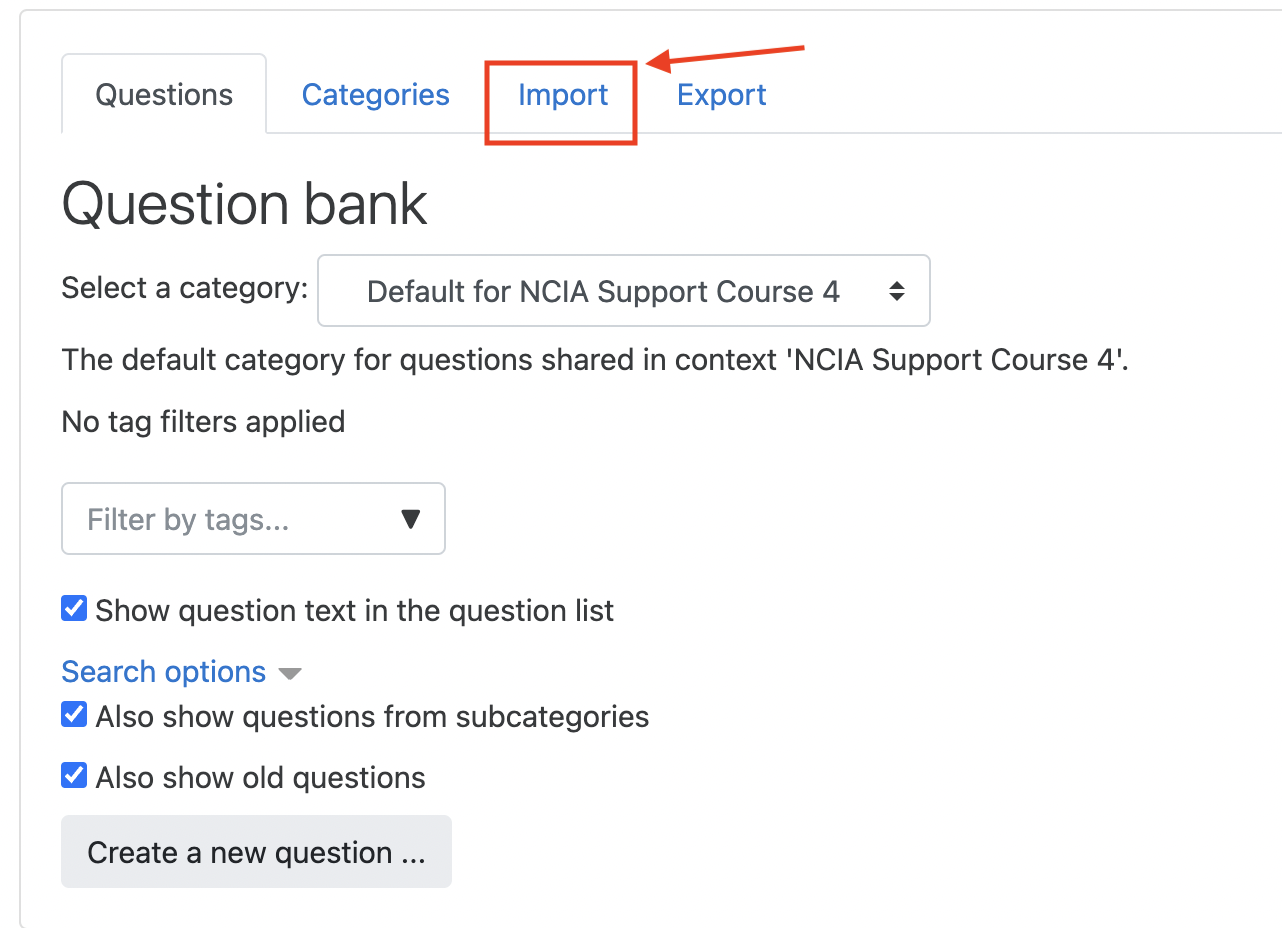
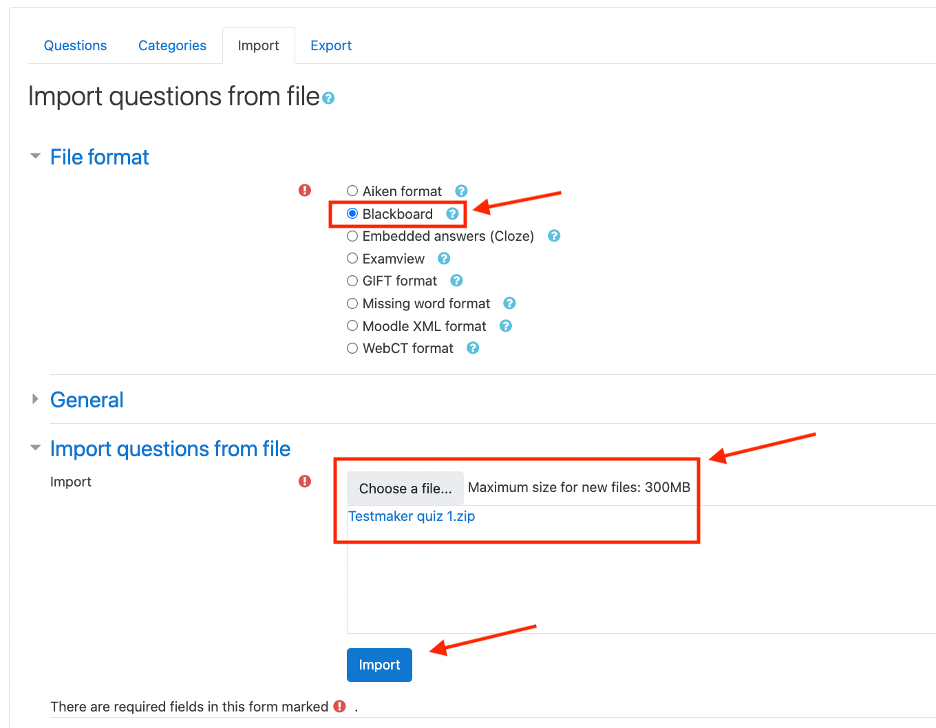
- From the import tab, select Blackboard as the file format. Then click Choose File, navigate to and select the downloaded zip file, then click Import.
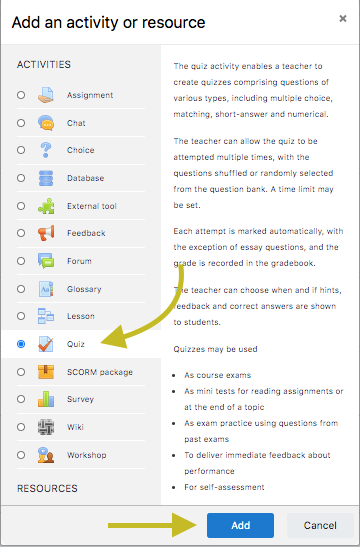
- Once you have the question bank imported, you will need to create your quiz. To do so, navigate back to the home screen for your course and click “Add an Activity or resource” to the right of Topic modules.
- In the window that appears, select Quiz from the options on the left. Then click add.
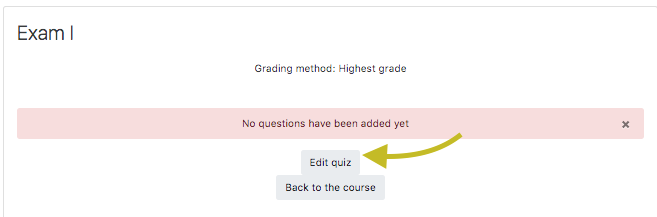
- Title your quiz, then click “Save and Display”.
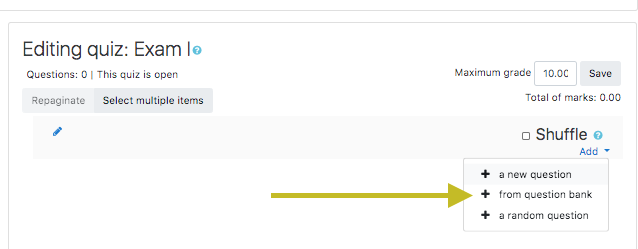
- On the next screen, click “Edit quiz”, then navigate to the right of the screen and select the “add” option followed by “from question bank” to add questions from your question bank.
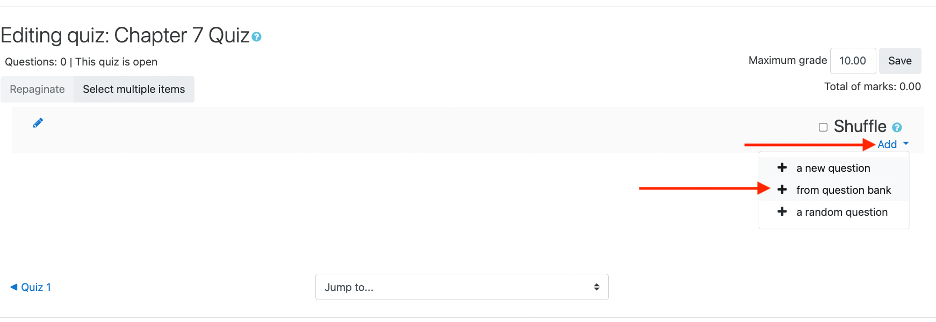
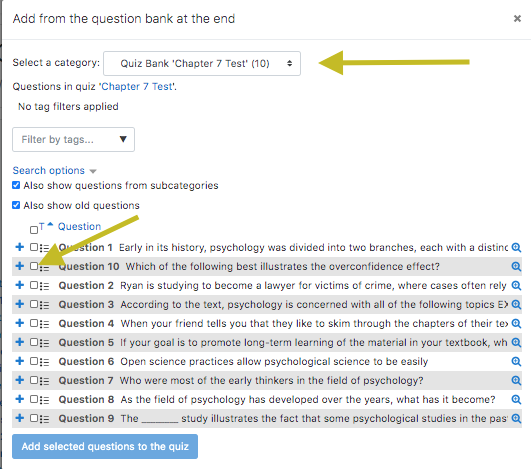
- In the window that appears, select your quiz from the “Select a category” dropdown and select your questions from the question bank. Then click ”add selected questions to the quiz” and save.


You can move the quiz from the top module to the appropriate module using the cross arrows beside the name of the quiz on the Course Main Screen.
Creating a Test Using Questions from Two or More Quizzes
Questions from any quiz in the Question bank can be selected and used in combination to create a new quiz.
- In the bottom right corner of the selected topic area, click on Add an activity or resource.

- In the Activities menu, select Quiz.
- Click the Add button.
- Name your quiz and complete any settings needed.
- Click Save and Display button.
- On the next screen, Moodle will indicate no questions have been added to the quiz.
- Click the Edit quiz button.
- On the next page, click on the Add and in the drop-down menu on the right, and select + from question bank.
- A window will appear allowing you to select questions from any quiz question bank.
- Select the question bank you want and check the questions to add.
- Click the Add selected questions to quiz button.
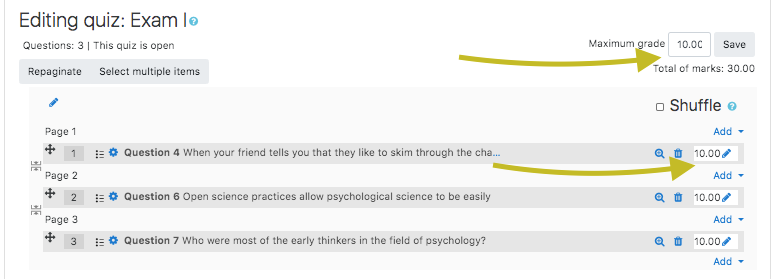
- Edit the maximum grade to reflect your course parameters.


Creating Random Pools
New quizzes can be created to pull a random selection of questions from existing and imported quiz pools.
- In the bottom right corner of the selected topic area, click the Add an activity or resource button.

- In the Activities menu, select Quiz.
- Click the Add button.

- Name your quiz and complete any settings needed.
- Click the Save and Display button.
- On the next screen, Moodle will indicate no questions have been added to the quiz.
- Click Edit Quiz.

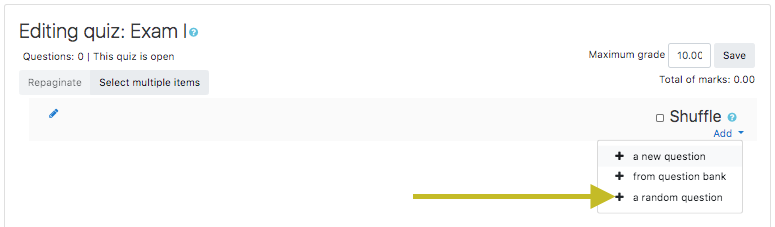
- On the next page, click the Add drop-down on the right, and select + a random question.
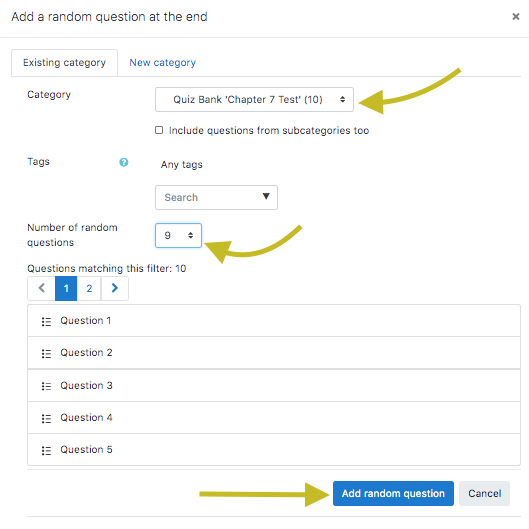
- The Random Question window will appear. From the Category drop-down menu, select a quiz bank to pull questions from.
- In the Number of random questions field, select the number of questions you want randomly selected and placed in the quiz.
- Click the Add Random Question button.
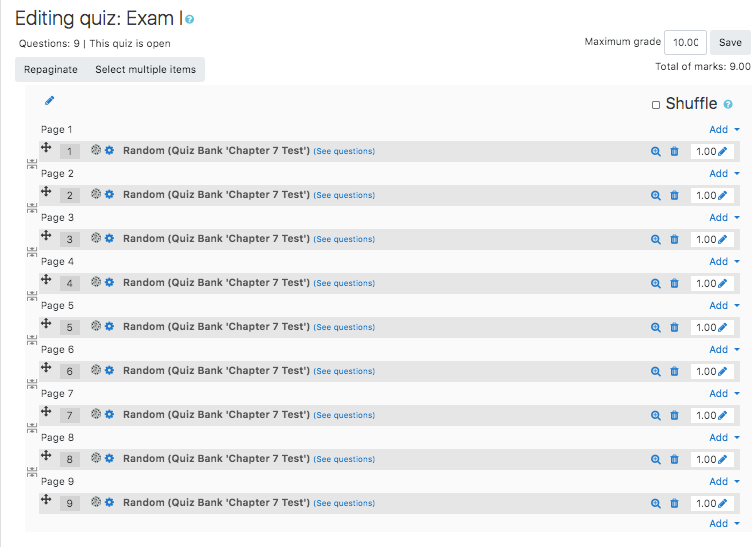
- Given the above example, your quiz has nine questions that will be pulled randomly and presented to the student once they start the quiz.
- Edit the point value for each question and the maximum grade for the quiz as needed for your course.


Importing a Made by Norton Test to Moodle
- Log into Moodle.
- Navigate to the course where you wish to import the test.
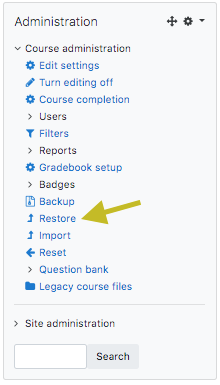
- In the Course Administration menu, select Restore.
- You can use the Choose a file ... feature to select the file from your computer or simply drag and drop the file in the specified location on screen.
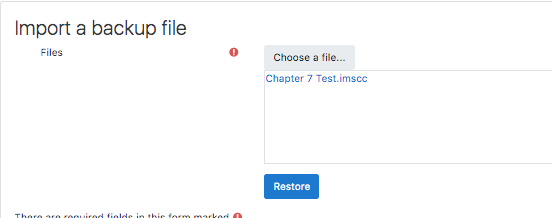
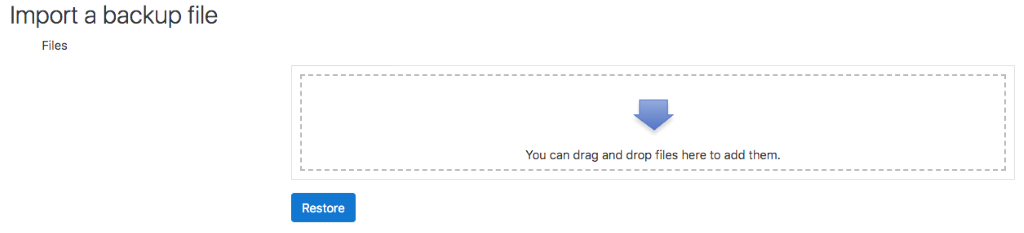
- Click on the Restore button.
- You will receive a notification that the file is an imscc 1.1 file.
- Click the Continue button.
- Select Restore into this course.
* ENSURE the radio button is beside Merge the backup course into this course.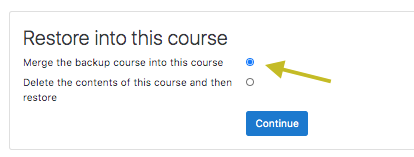
- Click the Continue button within the Restore into this course block.
- Click the Next button .
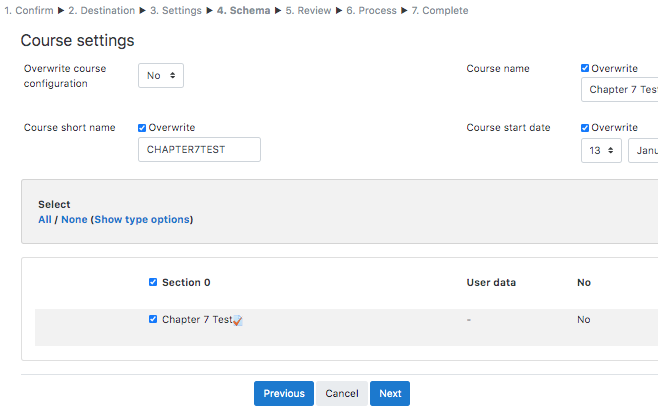
- In Course settings screen, do not make any modifications.
- Click the Next button.
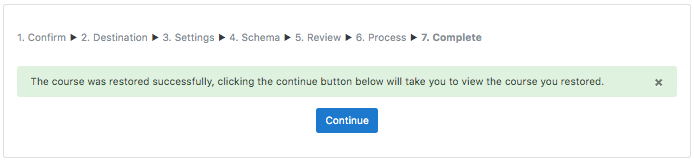
- Click the Perform Restore button.
- A message indicating the success of the process will display. Click the Continue button.
- Return to the course main screen.
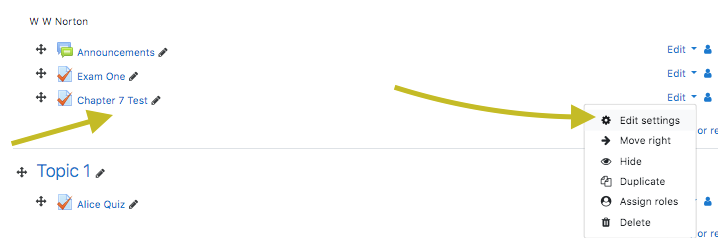
- Once the restore has completed, the test will appear in your course in the top module.
- Click on the Turn editing on button for the course.
- Select the Edit drop-down to the right the test.
- Select Edit settings.
- Modify the Question Behavior Settings for the test.
- Change the Question Behavior Settings from Adaptive Mode to Deferred Feedback.
- Change the timing for the test to meet your requirements.
- Click the Save button to apply your changes.


You can move the quiz from the top module to the appropriate module using the cross arrows beside the name of the quiz on the Course Main Screen.
Submit a Support Request
Still need help? Submit a support ticket and a customer support specialist will be happy to assist you.
Opened a request already? Click here for an update.