After building your test, you’ll want to export it from Norton Testmaker before uploading it to Schoology. See instructions to export the test from Norton Testmaker.
Importing a Test to a Schoology Course
- Open Your Schoology course.
- From the horizontal navigation select RESOURCES.

- Click the down arrow in the My Resources area and select Import.
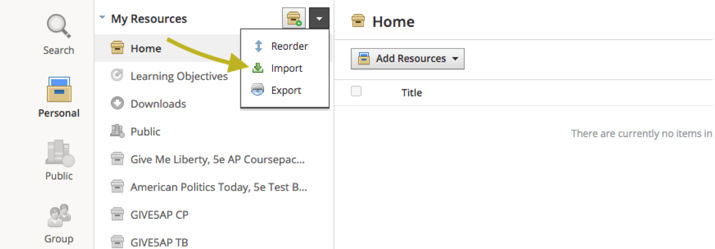
- The Import Collection window will appear.
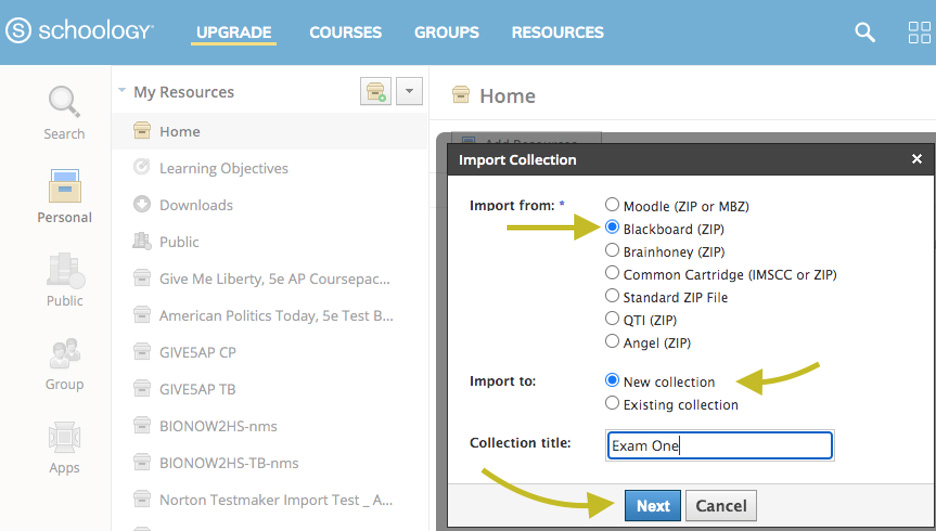
- On the Import from list, select Blackboard (ZIP). Note: for “Made by Norton” premade tests, you will need to select Common Cartridge (IMSCC or ZIP).
- On the Import to list, select New Collection.
- Type the name of your test in the Collection title field.
- Click the Next button.
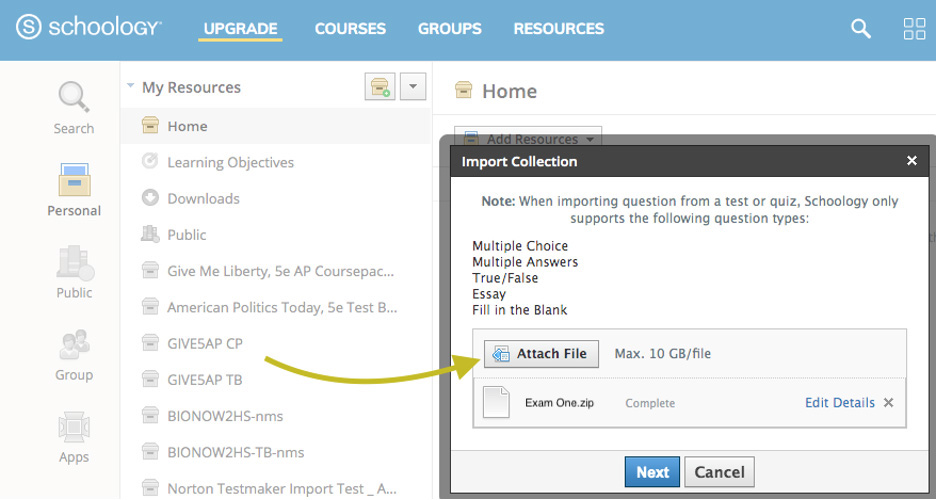
- Click the Attach File button.
- Select the ZIP file you downloaded from Norton Testmaker.
- Click the Next button.
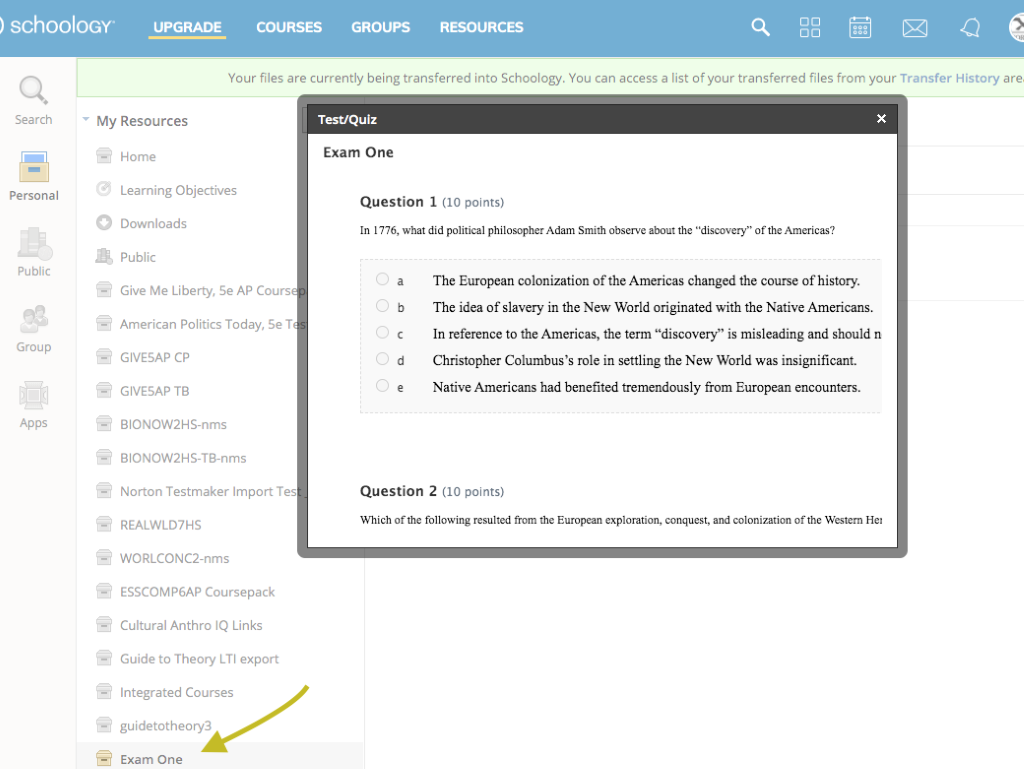
- Once the import is complete, you will see a new collection on the left side of the screen under My Resources.
- Click on the resource to open.
- Click on the W. W. Norton folder to open. The new test will be in the folder. Click on the test to view
Adding the Test to Your Course
- Navigate back to your course.
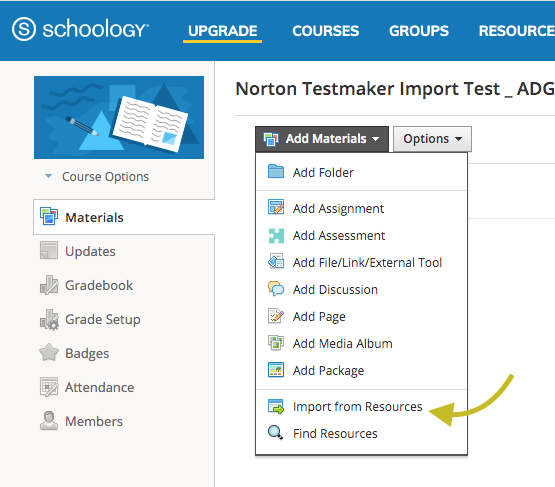
- Click the Add Materials dropdown and click Import from Resources.
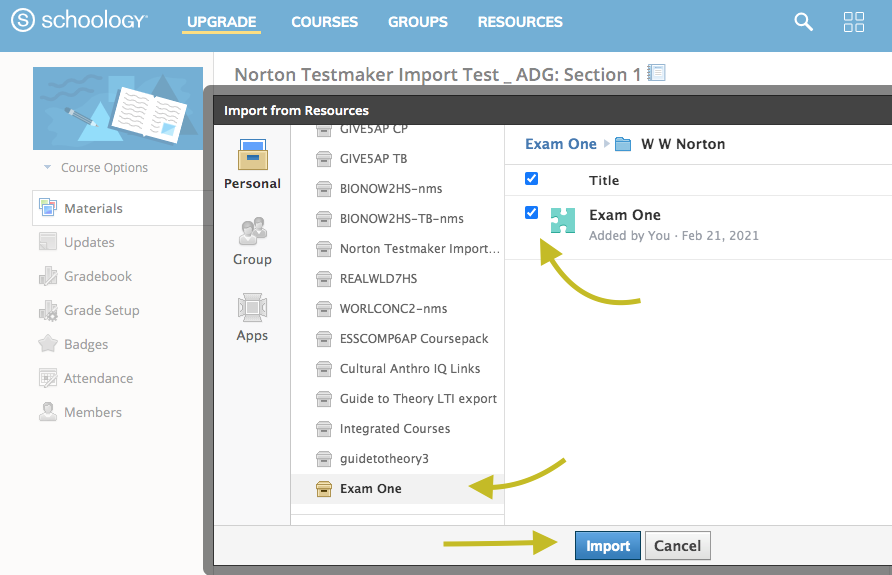
- Click the resource folder to open.
- Click the check box to the left of the resource title.
- Click the Import button.
- Click the Advanced Options link if you'd like to add more options to your test.
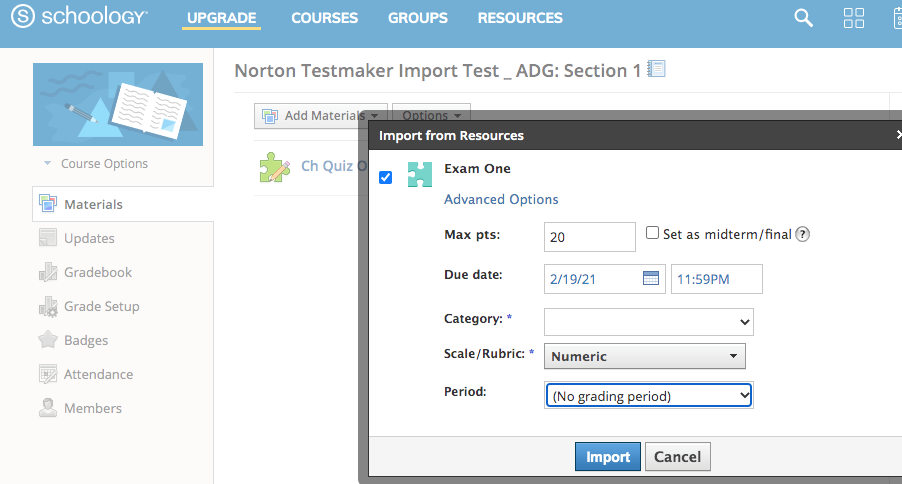
- Click the Import button to add the test to your course.
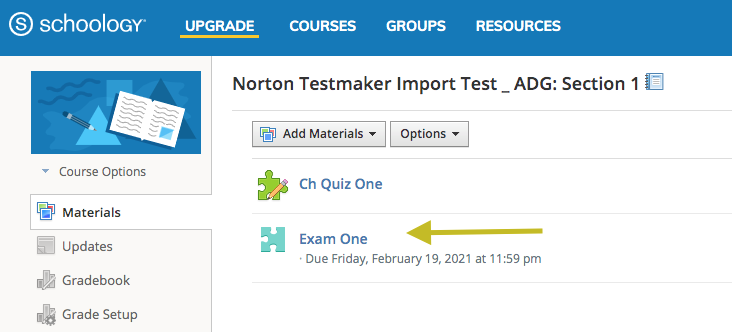
- The test will now appear in your course.
Submit a Support Request
Still need help? Submit a support ticket and a customer support specialist will be happy to assist you.
Opened a request already? Click here for an update.


